Wednesday, February 27, 2013

Double Layer Toddler Skirt


My youngest is outgrowing all her dresses and skirts. I learned long ago, with my oldest daughter, that it is so much cheaper to make a little skirt than to purchase one. When they are small, a skirt doesn't require much fabric so it keeps the cost down and is not difficult to do - no pattern is even required. They are easy enough for beginners to do. The more experienced sewer can be done in about 20 minutes.

I decided that I was going to do a double layer skirt. (To save fabric, you could sew a contrasting strip to the bottom and get a similar effect.) I wanted the extra body and flounce that the double layer would provide. Begin by measuring your little girl. You need the waist measurement and length measurement. Add 1 1/2 inches to the length measurement to allow for the waistband and the hem. This is the size you need your longer layer to be. I cut my red fabric 17 inches by the width of the fabric. (17"x42") The floral fabric I cut 3 inches shorter so it is 14"x42".

Serge or zigzag your edges to prevent them from fraying and sew each piece of fabric together at the salvages to create the side seams. You end up with 2 tubes of fabric. Place the longer tube inside the shorter tube, matching side seams. Stitch or serge the two layers together.


Measure and fold down the fabric that will create the waistband. When my kids are young, I use 1/2 inch wide elastic. As they grow bigger, I trade up to a 3/4 or 1 inch wide elastic to better hold the weight of more fabric.


Press the waistband down and then sew in place, leaving a hole to thread the elastic through. Thread the elastic through the casing and then close up the waistband.

Hem the two layers with just a simple rolled hem - and you're done! It's that simple.

I always keep a little fabric around as part of our emergency plan. Because I have learned some sewing skills, I know that I could make some simple skirts or shorts if needed for my kids. I could also patch a pair of pants or add a layer to an existing skirt to lengthen it - every skill could come in handy one day.

Wednesday, February 20, 2013

Freezer to Crockpot Meals

We are embarking on a kitchen remodel that will leave me without a functioning kitchen for a month or more. For someone who cooks every meal, nearly every day this will throw a serious wrench in our day to day routines. I am excited with what the new kitchen will bring. We have been saving money and making plans for over 3 years now so it seems high time to get it done!

In anticipation of being without a kitchen, I have had to make plans to cook on the bathroom counter. I went in search of recipes that I could prepare now and freeze to then thaw later and cook in the crockpot. I have done quite a few freezer meals over the years, but many of them require the oven to bake. I now have over 30 recipes prepped and waiting in the freezer. Some people do a month of meals in one day. I have often read about that method, but I know it wouldn't work for me. I never get that much focused time in the kitchen between kid's needs and other demands. I chose to do 7-8 meals at a time over a couple of weeks.

I am inspired by how easy it was to prepare them all. I mixed all the ingredients for each meal right in the gallon ziplock bag and didn't even dirty any bowls. I tried to group similar meals to the same prep time so I was pulling out similar ingredients. I did do some pre-cooking of dry beans to be ready to prep everything and I thawed meat I had only enough to pull it apart (but so there were still ice crystals in it) to keep it safe to throw back into the freezer. I had all the ingredients for the meals I chose on hand already which was really nice to stretch our budget and to help rotate what we store. A lot of the meals use chicken since I had stocked up with a recent sale.

I chose many recipes I have made in a crockpot before, but just haven't frozen before cooking. We haven't cooked any of the frozen meals yet, but I am very optimistic since I know what freezes well from past experience. I will share a few of the recipes below and post others as I have a chance.


Teriyaki Chicken - leave the cornstarch out since it does not hold up in the freezer at all. I prefer to stir in Ultra Gel just before serving to get the perfect thickness. For more about Ultra Gel click here. You can always add the cornstarch to the crock pot as you put the meal in to cook if you don't have Ultra Gel. Serve over cooked rice and stir-fry some frozen veggies for a side dish.
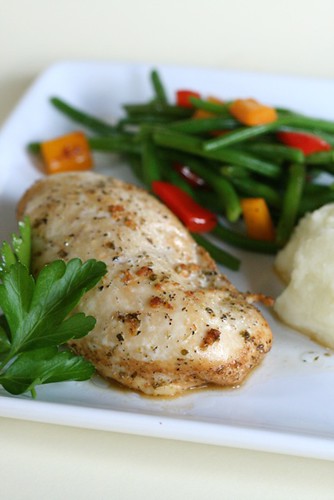

Marinated Chicken - Just throw some marinade in the bag with chicken breasts and then freeze. Thaw and grill or dump all in the crockpot for flavorful, juicy chicken. Chicken always cooks for 3-4 hours on high or 6-8 hours on low in a crockpot. Serve a veggie tray and some sliced fruit on the side.


Creamy Black Bean Chicken - Put everything in the gallon ziplock bag except the cream cheese. Make a note on the bag to add cream cheese just before serving. Serve with tortilla chips for dipping or roll in a tortilla. Serve a green salad on the side.


Creamy Italian Chicken - I threw all the ingredients in my gallon ziplock bag including the cream soup and cream cheese. I have cooked it this way before and had great luck. I have found that I need to stir it a few times during the cooking process so the gravy doesn't burn on the edges. That means this is not a meal to cook on a day you have to be away for the full 4 hour cooking time. Serve over cooked egg noodles or rice. Serve a green salad or frozen veggies on the side.

FreezerCookingBeefStew
Slow Cooker Freezer Beef Stew - I am trying this new recipe. I made just a couple of changes. I used frozen sliced carrots and omitted the potatoes. I will add them as I put it in the crockpot. (I know that potatoes turn black when frozen raw and I didn't want to deal with that.) I left the flour and cornstarch out since they would break down in the freezer. To help thicken the stew, I increased the tomato paste to 6 oz. I will add more thickener if needed just before serving. I will also add frozen peas the last 15-20 minutes of cooking.


Island Chicken Here is another new recipe I am trying. Her list of recipes on her post is inspiring - I didn't use all her recipes, but the titles made me turn to recipes of my own that I knew we liked with similar titles. Isn't that what food bloggers do - inspire us to enjoy dinner again?


Mongolian Beef Here is another new recipe from whoneedsacape.com. We are excited to try it.

That's enough recipes to share for one night. With the ones I had ready to share and the list from whoneedsacape.com anyone ready to try this method has plenty to think about.

Friday, February 15, 2013

Upcoming Free Class


I have been asked to present some classes at a local preparedness store one day each month. Food 2 Store is located on Fariview just west of Eagle Rd (by Seagull Book.) These classes are free to the public so tell your friends and family - it would be fun to have a large group there! (Disclaimer: I don't work for the store. I teach classes on a volunteer basis only.)

Tuesday, February 19th 1:00 p.m.
Turning Food Storage into Convenient Mixes to Make Rotating Easy

Do you already have a lot of food storage but you're not quite sure how you would use it to actually feed your family? This class is designed to share tips and tricks to turn your food storage into convenient meal solutions. Save money on groceries and eat healthy by using basic ingredients that are easy to store. Many recipes will be shared and a tasting table with samples will be provided. Space is limited so reserve your spot today by emailing or calling Food 2 Store. (208)475-1300

Monday, February 11, 2013

Soft Shell Corn Tacos

This is one of the easiest, yet tastiest meals I remember from my growing up days. It is one my mom used to make often. If you have hamburger already browned and frozen this meal can come together very quickly.

For the filling: Mix 2 cans pork and beans with 1/2 pound of browned hamburger.

Add a little taco seasoning. You can pour in one packet or just buy the large bottle and sprinkle in 1-2 Tbsp depending on how spicy you like it.


I decided to stir in come cooked wheat berries to add fiber and whole grain. I used about 3/4 cup. (You could use quinoa or brown rice in place of the wheat or just leave it out all together. For instructions for cooking the wheat, click here.) Mix and heat through. I always mix it in a glass bowl so it can be heated in the microwave.

Mix the ingredients for the soft corn shells - see recipe below.

Cook like you would crepes. Pour a little in a warm non-stick frying pan and swirl it around so it covers the entire bottom of the pan. Cook on one side and then flip over to cook on the final side.

Place some filling down the center.

Add some shredded cheese.

Roll up.

Top with additional shredded cheese if desired.

It's that simple - kids and adults love them!


Soft Shell Tacos


Shells:
Filling:
2 cups cold water
2 cans pork 'n beans
2 eggs
½ lb hamburger, browned
1 cup corn meal
Taco seasoning
1 cup all-purpose flour
Shredded cheese
¼ tsp salt


Use dried or frozen eggs, if needed. Mix and pour a small amount into a non-stick frying pan. Spread out into a very thin pancake, similar to how you cook crepes. Flip once to complete cooking. Fill with taco filling made from pork ‘n beans and hamburger, seasoned with taco seasoning. Top with shredded cheese before rolling up. These must be eaten with a fork. You cannot pick them up.


Thursday, February 7, 2013

Cooking Wheat Berries or Kernals


Cooked wheat is a great way to add the benefits of whole grain to your diet. You can add a little sugar and milk and enjoy it as a hot cereal for breakfast. There are also plenty of other ways to use the cooked wheat. I've been getting a little creative around her adding it to many dishes - the kids are used to my experimenting by now so it doesn't surprise them at all. They also haven't complained so I guess I've picked some good things to add it to so it "hides" well. I've added it to taco filling, chili, salads, and vegetable soups. They've all been really good. I'll get some recipes posted soon that it has worked well in.

Cooking wheat is easy. I store hard, white wheat so it is what I have been cooking. It is nutritionally equal to hard, red wheat but has a milder flavor. I've cooked it in quite a few ways.


Cooking Wheat Berries

On the Stovetop – Combine 1 c. wheat berries and 2 ½ c. water in a saucepan. Cover, bring to a boil, lower heat to simmer on lowest setting. (Just as you would for cooking rice.) Cook until grains are soft—about 1 to 1 ½ hours. You might have to add water to prevent scorching. Just check on it periodically. Cooked wheat berries freeze very well so don't be afraid to cook a large batch.

Crockpot Instructions – Combine 5 cups wheat berries and 10 cups water. Turn on low and leave overnight. My friend's family would eat this for breakfast with a little sugar and milk added. They called them footballs. You can freeze any extra to use in recipes another time.

Thermos Instructions – Put 5 cups wheat berries in a thermos with 10 cups boiling water and leave on the counter overnight. In the morning, you’ll have 15 cups of wheat berries. Freeze any you don’t use. Sometimes, they aren't quite done cooking and the water has cooled down too much. I just pour them out into a pan and heat it back up. They are done in about 10 minutes. This way significantly reduces my "hands-on" time.

How to Test Wheat Berries for DonenessTest for doneness by removing a grain and tasting. It will be chewy with a soft center. Whole wheat berries stay chewier than rice. You can substitute them for almost all the recipes that require rice. Try to remember that wheat berries take longer to cook and need a little more liquid than rice. For more flavor, try cooking the berries in chicken broth or vegetable juices.

Freezing Wheat Berries – Wheat berries freeze very well once they are cooked. Be sure to cook up a large batch and freeze for later use. I just put the cooked wheat berries in freezer ziplock bags marked with the date. They last for 1 year in the freezer.

 Stretching Your Hamburger with Wheat Berries – Cook wheat berries and allow to cool. If desired, grind with a meat grinder. This will give them the appearance and texture of ground beef. Combine equal parts ground wheat berries and hamburger in your frying pan. The hamburger with the highest fat content will give the wheat berries more of a meaty flavor. Cook together to season your wheat and use in recipes calling for hamburger. You can do this same thing with ground turkey or sausage. Ground wheat berries store very well in the freezer. I keep some on hand and add them to meat whenever I am cooking up a big batch. Once the meat is cooked, I freeze the wheat/meat combination to make dinner prep go quickly another night. It makes a healthier meal and stretches our food budget as well. You could use other whole grains in the same way. I think I would try quinoa or brown rice. 
 
A Word of Caution – Whole wheat is very high in fiber compared to what most people are used to. Switching to whole wheat all at once can upset your digestive tract and make you uncomfortable. As with any major food change, add it to your diet gradually over time and you will adjust just fine.